
Step-By-Step DIY Dried Flower Christmas Ornaments.
We thought it would be a good idea to make some dried flower Christmas ornaments. But of course, we wanted to put our own spin on it. Read on and follow along so you can make your own special ornaments this Christmas too.

Step 1: Layout Your Items and Ingredients.
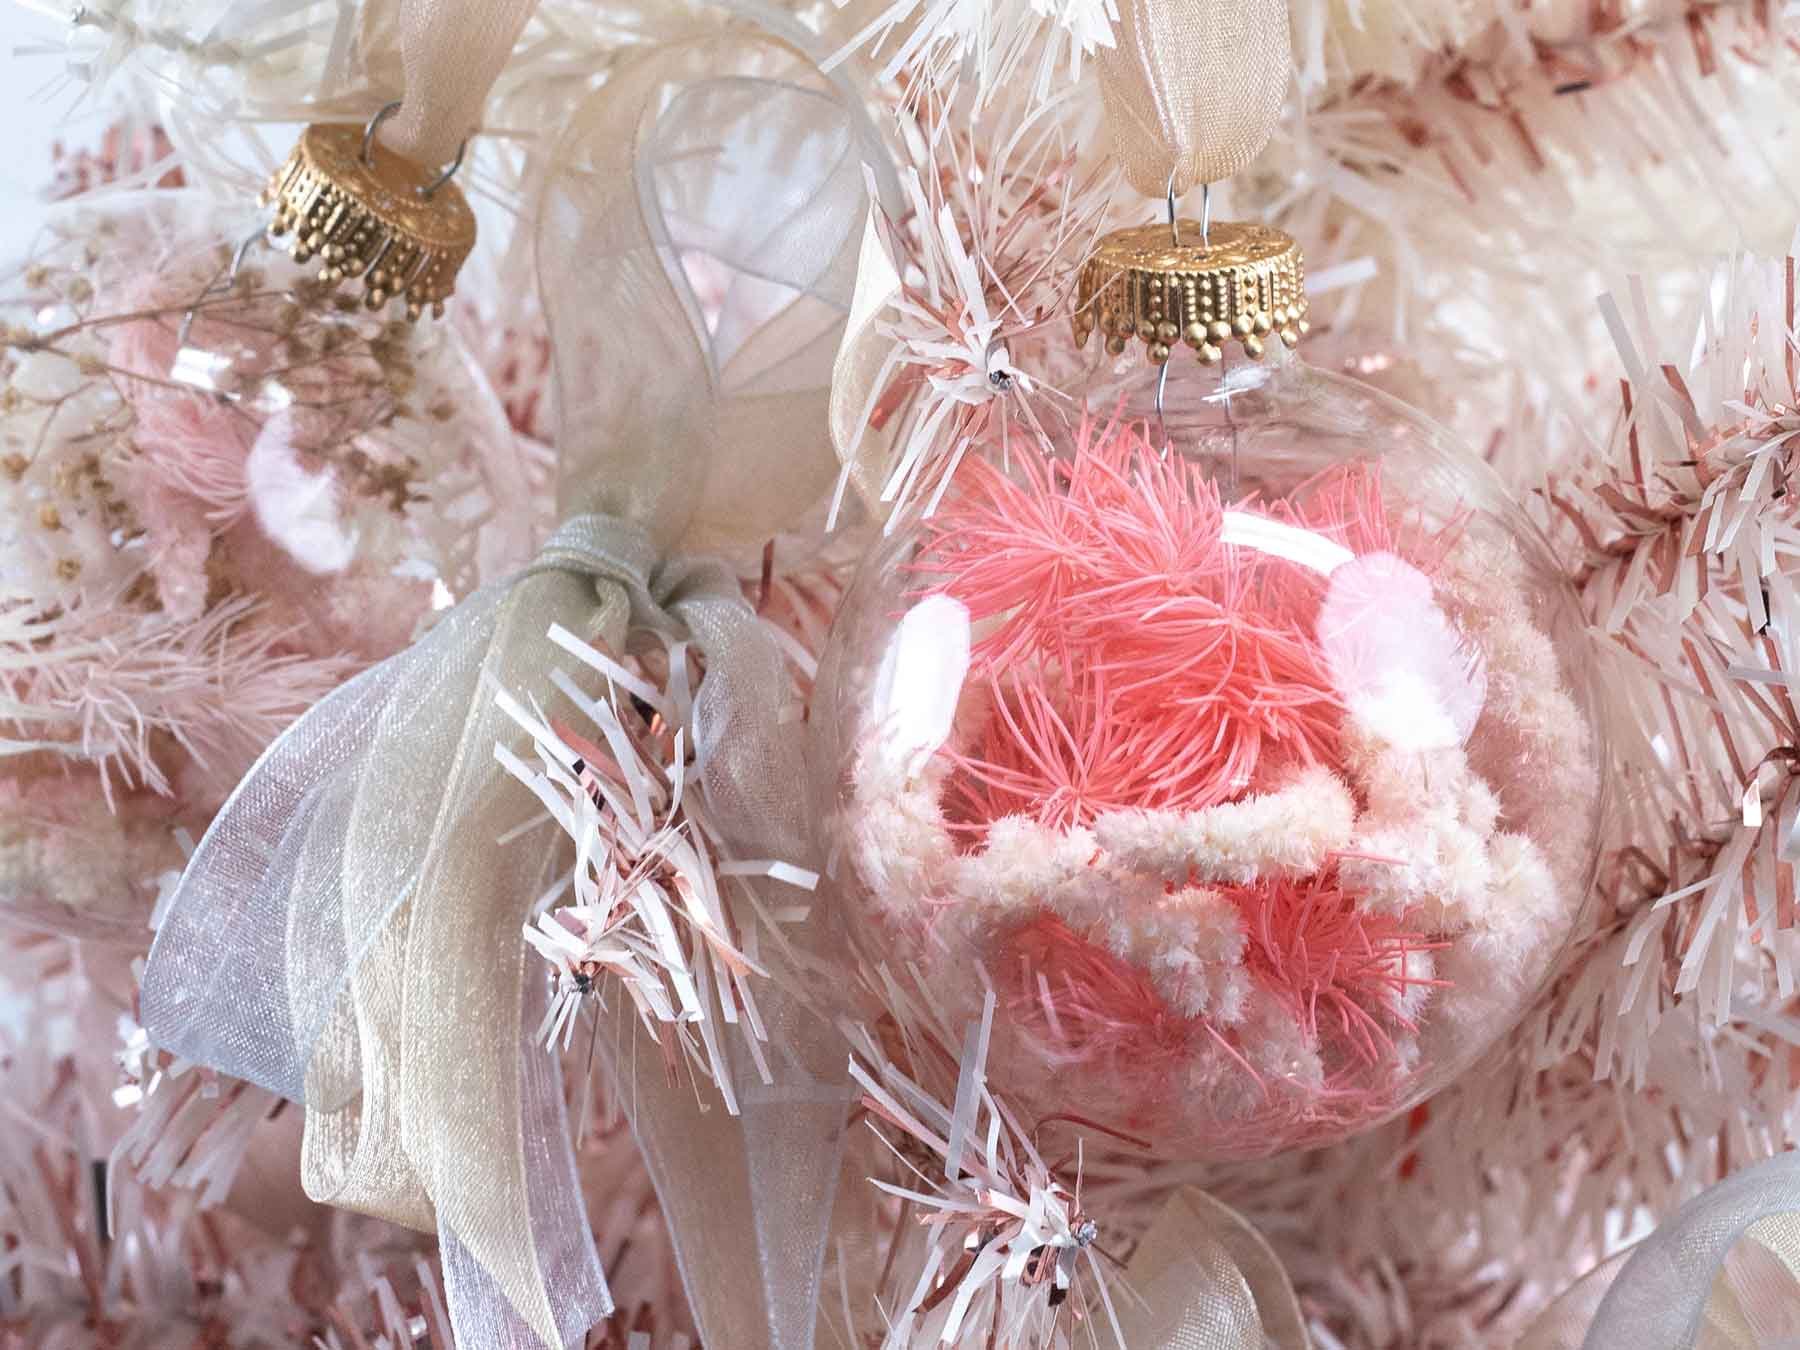
First, you will need 2-3 different types of small dried flowers. We chose 3. Try to think about different textures with this one. This will help add some contrast inside of the ornament. It would be good if one of them had some volume to it. This will help take up space. We chose for this ingredient preserved mink fern which has been dyed pink.
Next, you will want a clear glass ornament and some ribbon of your choice.
Lastly, you will want some tweezers. We used some angled craft tweezers that we had lying around the house. These are optional, but really helpful when you want to delicately move something around in the ornament.
You can get tweezers and ornaments on Amazon. (Affiliate link.)

Step 2: Pop the Top on the Ornament. (Carefully)
The first thing to do is to carefully remove the top from the ornament. Slowly pull up and make sure that the wire on the interior does not break the glass. These ornaments are fragile. We recommend buying some that have a little bit thicker glass (This will ensure longevity over time). Plastic ornaments are also an option, but we prefer glass because they don’t have the seam running around the middle.

Step 3: Start to Fill the Bottom Layer.
Now it is time to start filling your ornament. As you can see the opening is very small, so choose small flowers and foliage that will fit the opening.
Grab your primary ingredient and start dropping into the opening to build a small layer on the bottom. Then add your next product on top. Do the same with your last product.
It’s good to remember that we are dropping the dried flowers in. It can be hard to control where they land. But don’t worry you can move things around with your tweezers.
If you’d like to start over you can always tilt your ornament upside down and gently pull the items out with your tweezers.

Step 4: Start to Fill the Middle Layer.
By this point, you should have built up your layers to the middle section of your ornament. You should be using at least two of your three products. Continue to add product by layering. This will give your ornament a lot of dimension.
One helpful tip is to gently shake the ornament to get the items to shift where you would like them to be. Don’t shake too hard or you could mess up what you were intending. You can always make edits with your tweezers.

Step 5: Start to Fill the Top Layer.
Make sure that you fill the ornament up to the point where there is no movement in your product when you shake it gently. Your product should be snug, but not overcrowded.
Remember to layer your product. By this point, you should have used all of your ingredients and dispersed them in a way that you think looks best.
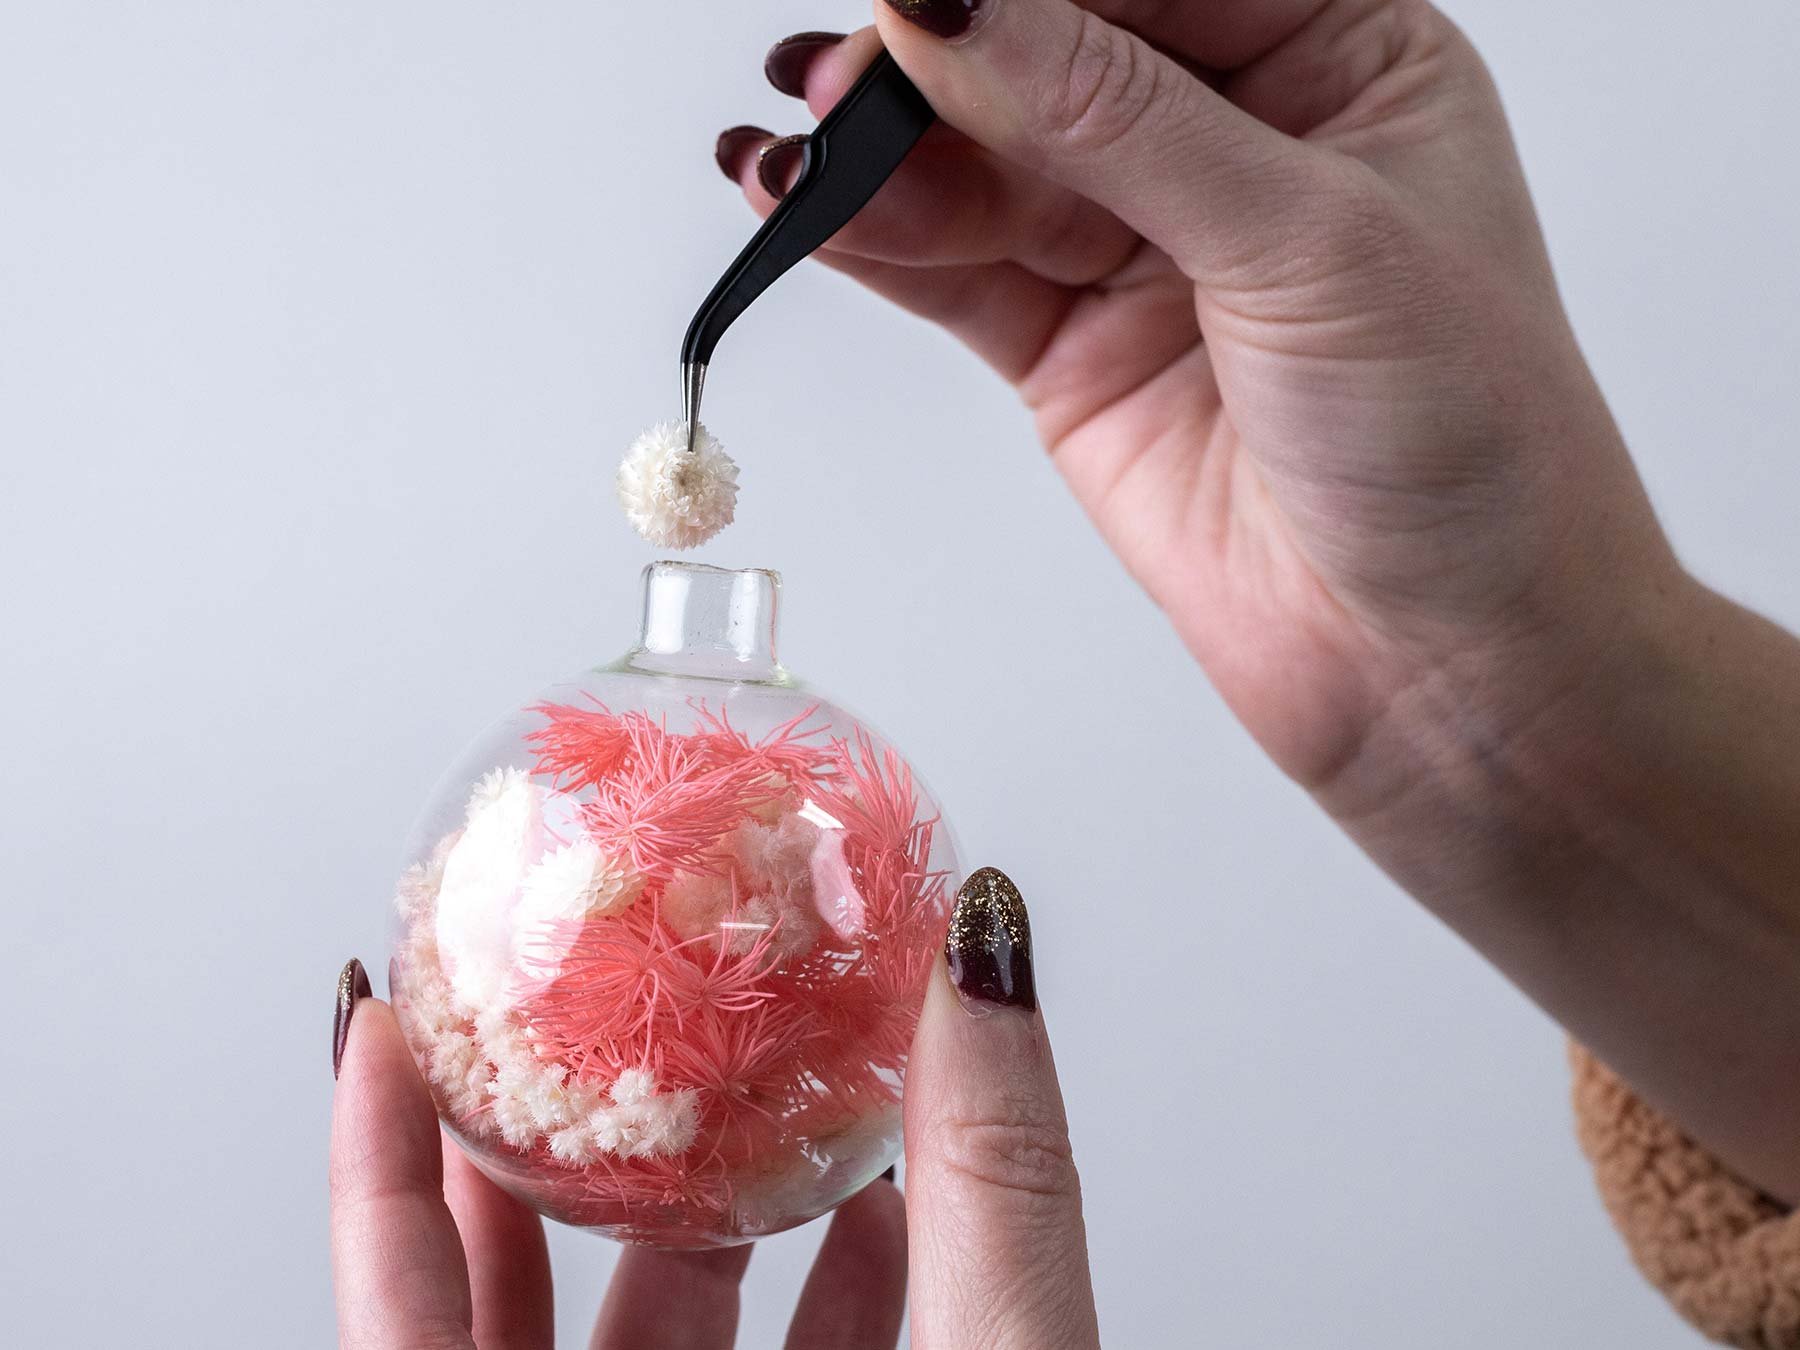
Step 6: Use Tweezers to Shift Around Your Final Placements.
Lastly, you should use your tweezers to place things where you think they should be. There is no rush here, so move things around and get it looking festive.
After we layered each product twice we took a look at our ornament to see which ingredient we might want a bit more of. We chose our smallest ingredient and added a few more of them around the arrangement. We had to use tweezers for this.
See if there is anything you would like to move, or add, and use your tweezers to adjust the placement.

Step 7: Apply Cap and Tie On Your Ribbon.
Grab the ribbon that you set aside at the beginning of this tutorial and tie a loop with a bow.
We decided to use two different color ribbons and stack them on top of each other when we tied our bow. This makes it look like there are two bows in one. We think it looks great!
Grab your favorite ribbon and tie your favorite bow. Make sure to leave some slack in the loop so that you can place it on a tree branch. If you are doing multiple ornaments, try some different color ribbons that match!

Step 8: Make Some More!
Decorate your whole tree with your own custom ornaments or make them as presents. These make great gifts for all of your friends and family.
We would love to see what you make, tag us @waldenfloral with all of your beautiful creations.
As an Amazon Associate, Walden Floral LA LLC earns from qualifying purchases. Please check out our Privacy Policy for more info.